Note : This tutorial only works for Xcode 5 or Higher versions and Objective-c. As Apple released Xcode 6 and Swift,We will have another tutorial later on Swift.
The Hello World tutorial is the first programming article written for this blog and we will move on in future articles with interesting topics 7 tutorials. to make sure you like this post and want me to continue , please feel free to comment , ask Questions and let me know if you are looking for some thing else. I have some open sourced controls such as SPHChatBubble, SPHChatCollectionview etc in my github home page https://github.com/sibahota059 you can visit them later when you are ready with iOS concepts & programming knowledge.
In previous versions of Xcode , the default for mat for creating UI was XIB files but, Xcode 5 promotes the use of Storyboard instead of Interface Builder.
When you create a new Xcode project using the Single View template, it
defaults to Storyboard. There is no XIB file generated. Let me use Interface Builder to build this tutorial project. It
doesn’t mean i prefer Interface Builder over Storyboard, which is
great. I just want you to learn both.
Enter the Hello World tutorial for Xcode 5.
You may have heard of “Hello World” program if you have read any programming book before. It has become the traditional program for first-time learner to create. It’s a very simple program that usually outputs “Hello, World” on the display of a device. In this tutorial, let’s follow the programming tradition and create a “Hello World” app using Xcode. At the end you will be able to cover the following topics.
You may have heard of “Hello World” program if you have read any programming book before. It has become the traditional program for first-time learner to create. It’s a very simple program that usually outputs “Hello, World” on the display of a device. In this tutorial, let’s follow the programming tradition and create a “Hello World” app using Xcode. At the end you will be able to cover the following topics.
- A better idea about the syntax and structure of Objective C.
- A basic introduction to the Xcode & You’ll learn how to create a Xcode project and create user interface with the built-in interface builder.
- Compiling , building & testing apps on iOS Simulator.
Lets take a look at the out put how it will come at the ending ( The final deliverable ).
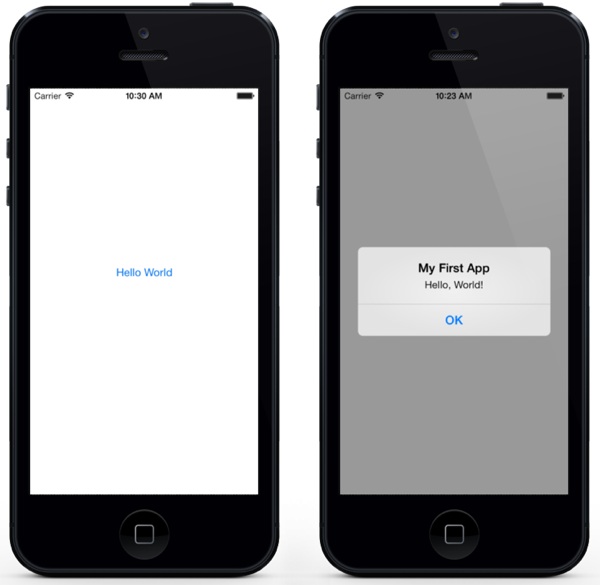
This app is very simple and shows only a “Hello World” button. When tapped,
the app prompts you a message. That’s it. Nothing complex but it helps
you kick off your iOS programming journey.
To start a new project , launch Xcode from your launchpad. Once launched, Xcode displays a welcome dialog. From here, choose “Create a new Xcode project”.

Picture for welcome dialogue Xcode-5
Xcode shows you various project template for selection. For your first app, choose “Empty Application” and click “Next”.

Hello World Project Options
You can simply fill in the options as follows:
- Product Name: HelloWorld – This is the name of your app.
- Company Identifier: com.domainame – It’s actually the domain name written the other way round. If you have a domain, you can use your own domain name. Otherwise, you may use mine or just fill in “edu.self”.
- Class Prefix: HelloWorld – Xcode uses the class prefix to name the class automatically. In future, you may choose your own prefix or even leave it blank. But for this tutorial, let’s keep it simple and use “HelloWorld”.
- Device Family: iPhone – Just use “iPhone” for this project.
- Use Core Data: [unchecked] – Do not select this option. You do not need Core Data for this simple project.
If you’ve used Xcode 4.6 or lower, you may find the option of “Use Automatic Reference Counting” and “Include Unit Tests” options are left out in Xcode 5. They are not options in Xcode 5 but defaults.
Click “Next” to continue. Xcode then asks you where you saves the “Hello
World” project. Pick any folder (e.g. Desktop) on your Mac. You may
notice there is an option for version control, Just deselect it. As you confirm, Xcode automatically creates the “Hello World” project
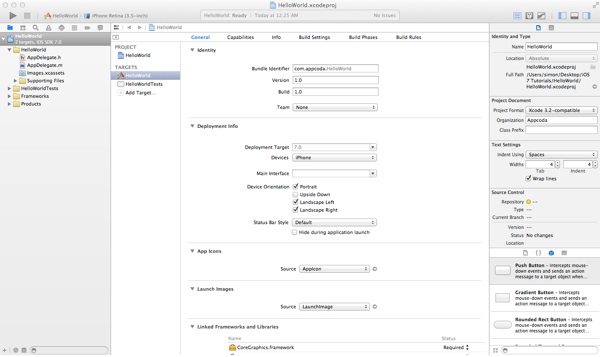
based on all the options you provided. The screen will look like this:
A quick look at the Xcode
Let’s take a few minutes to have a
quick look at the Xcode workspace environment. On the left pane, it’s
the project navigator. You can find all your files under this area. The
center part of the workspace is the editor area. You do all the editing
stuffs (such as edit project setting, class file, user interface, etc)
in this area depending on the type of file selected. Under the editor
area, you’ll find the debug area. This area is shown when you run the
app. The rightmost pane is the utility area. This area displays the
properties of the file and allows you to access Quick Help. If Xcode
doesn’t show this area, you can select the rightmost view button in the
toolbar to enable it.

Lastly, it’s the toolbar. It provides various functions for you to run your app, switch editor and the view of the workspace.

Run Your App for the First Time

A white screen with nothing inside?! That’s normal. As your app is
incomplete, the Simulator just shows a blank screen. To terminate the
app, simply hit the “Stop” button in the toolbar.
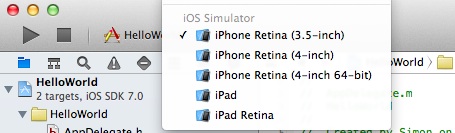
By default, Xcode sets to use iPhone Retina (3.5-inch) as the
simulator. You are free to select other simulators to test the app. Try
to select another simulator and run the app.
Back to Code
Okay, let’s move on and start to add the Hello World button to our
app. Before we can put a button, we first need to create a view and its
corresponding controller. You can think of a view as a container that
holds other UI items such as button. Go back to the Project Navigator.
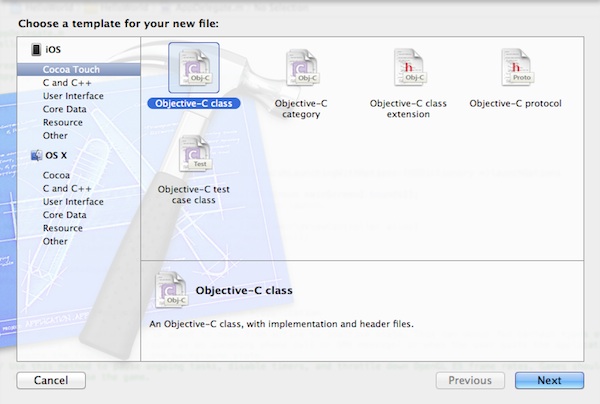
Right-click on the HelloWorld folder and select “New File”.

Adding a new file in Project Navigator
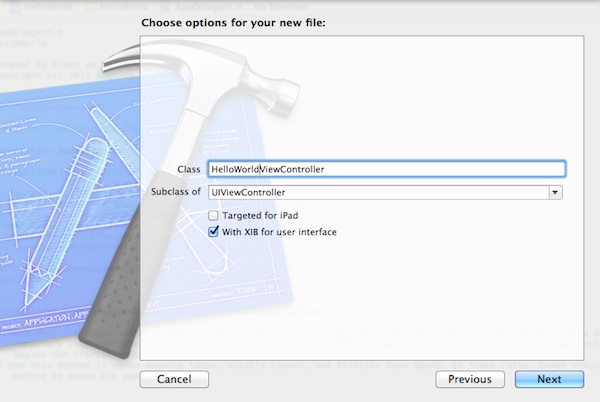
Name the new class as HelloWorldViewController and the subclass as UIViewController. Make sure you check the “With XIB for user interface” option. By selecting this option, Xcode automatically generates a Interface Builder file for the view controller.
You’ll be prompted with a file dialog. Simply click the Create button
to create the class and XIB. Once done, Xcode generates three new files
including HelloWorldViewController.h, HelloWorldViewController.m and
HelloWorldViewController.xib. If you select the
HelloWorldViewController.xib file, you’ll find a empty view similar to
the below image:

HelloWorld Interface Builder (.xib)

Drag button into the View
Next, let’s rename the button. To edit the label of the button, double-click it and name it “Hello World”.

If you now try to run the app, you’ll still end up with a blank
screen. The reason is that we haven’t told the app to load the new view.
We’ll need to add a few lines of code to load up the HelloWorldViewController.xib. Select the AppDelegate.m in Project
Navigator. Add the following import statement at the very beginning of
the file:
#import "HelloWorldViewController.h"
|
In the didFinishLaunchingWithOptions: method, add the following lines
of code
self.window.backgroundColor = [UIColor
whiteColor];
HelloWorldViewController *viewController = [[HelloWorldViewController alloc] initWithNibName:@"HelloWorldViewController" bundle:nil];
self.window.rootViewController = viewController; |
Your code should look like this after editing:
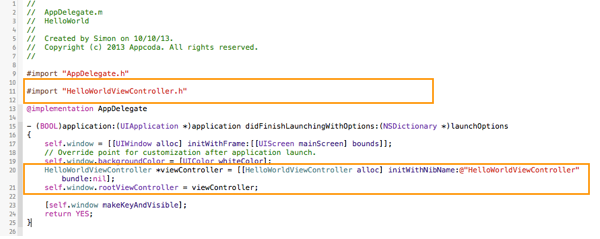
What you have just done is to load the HelloWorldViewController.xib and set it as the root view controller. Now try to run the app again and you should have an app like this:
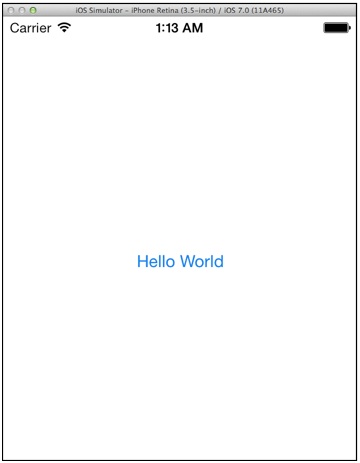
For now, if you tap the button, it does nothing. We’ll need to add the code for displaying the “Hello, World” message.
Coding the Hello World Button
In the Project Navigator, select the “HelloWorldViewController.h”.
The editor area now displays the source code of the selected file. Add
the following line of code before the “@end”
| #import <UIKit/UIKit.h> @interface HelloWorldViewController : UIViewController -(IBAction)showMessage; @end |
Next, select the “HelloWorldViewController.m” and insert the following code before the “@end” line:
- (IBAction)showMessage
{
UIAlertView *helloWorldAlert = [[UIAlertView alloc]
initWithTitle:@"My First App" message:@"Hello, World!" delegate:nil cancelButtonTitle:@"OK" otherButtonTitles:nil];
// Display the Hello World Message
[helloWorldAlert show];
}
{
UIAlertView *helloWorldAlert = [[UIAlertView alloc]
initWithTitle:@"My First App" message:@"Hello, World!" delegate:nil cancelButtonTitle:@"OK" otherButtonTitles:nil];
// Display the Hello World Message
[helloWorldAlert show];
}

Select the “HelloWorldViewController.xib” file to go back to the Interface Builder. Press and hold the Control key on your keyboard, click the “Hello World” button and drag to the “File’s Owner”. Your screen should look like this
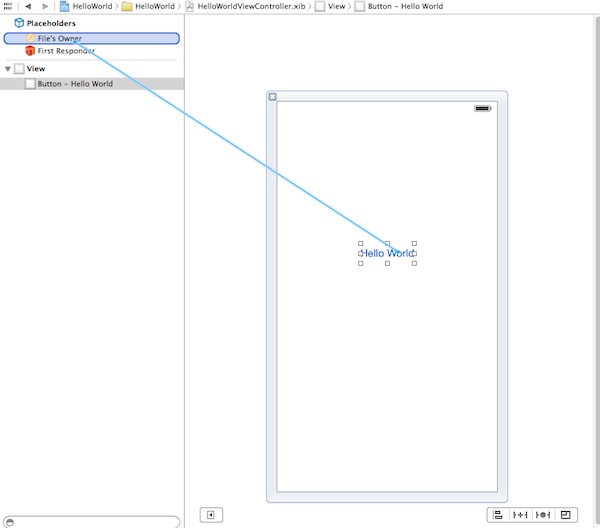
Release both buttons and a pop-up shows the “showMessage” action. Select it to make a connection between the button and “showMessage” action.

Send Events Selection
Test Your App
That’s it! You’re now ready to test your first app. Just hit the “Run” button. If everything is correct, your app should run properly in the Simulator.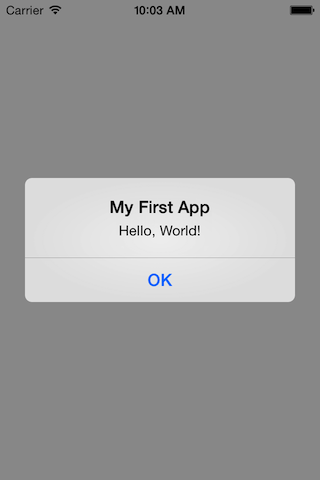
Congratulation! You’ve built your first iPhone app. It’s a simple app however, I believe you already have a better idea about Xcode and how an app is developed.
No comments:
Post a Comment